Get started – create your chemical dataset in IUCLID
Introduction
After setting up your IUCLID environment, you will work mainly in 2 areas:
- Inventory manager
- Substances.
This page provides a high-level overview of the steps involved in preparing and submitting your IUCLID dossier for an AICIS assessment certificate. Each step is explained in more detail in later sections of this guide.
You do not need to complete these steps strictly in order. IUCLID is designed to let you enter and update information at any time before exporting your dossier. However, following this sequence will help you set up your dataset correctly and avoid common issues later in the process.
Step 1: Prepare your IUCLID environment
Before creating a dataset, you need to:
- install and access your own IUCLID instance
- confirm which AICIS certificate application working context applies to your dataset (also called an ‘AICIS working context’).
Tip: You can start IUCLID and begin setting up your dataset before gathering all information. You can update your data at any time before exporting your dossier.
Step 2: Create a substance dataset
A substance dataset is the central repository for all information you will submit in your dossier. At this stage, focus on creating the dataset and entering basic identification information (such as the substance name and legal entity) – you can return to it later to complete remaining fields.
To begin:
- create a new substance dataset
- select an AICIS working context
- give the dataset a clear, identifiable name under substance name
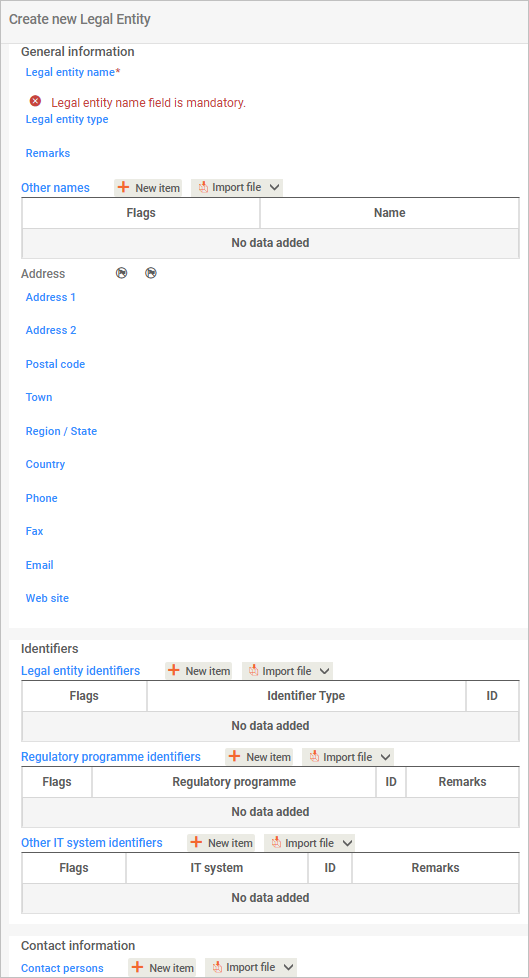
- ensure the correct legal entity is entered under 1.1 Identification (general information section).
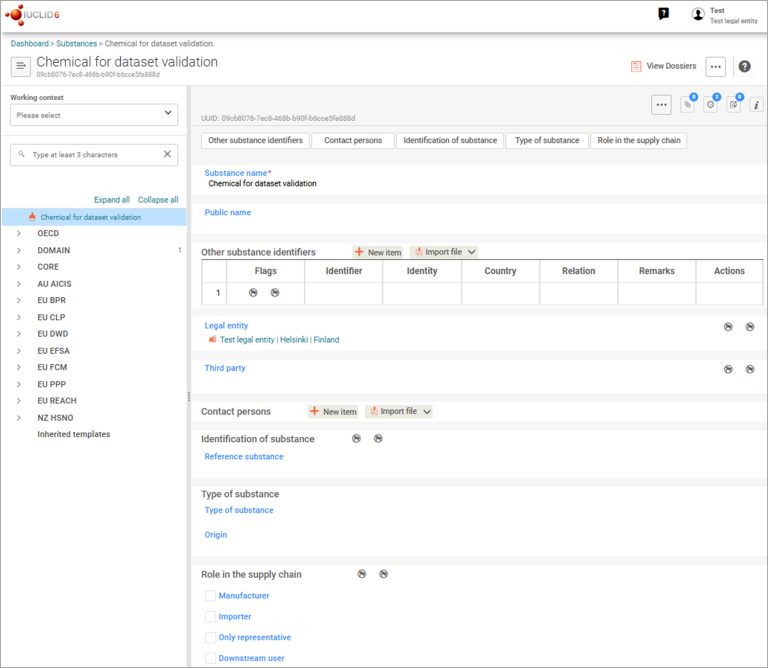
Legal entity includes the business applying for the assessment certificate and third parties, such as an agent.
If you are the applicant, select company from the dropdown list.
If there is an agent, select third party.
You do not need to complete Legal entity identifiers and Other IT systems identifiers.
You can complete the Regulatory programme identifiers if your company takes part in any of the programs listed in the pick list. Select Other for AICIS.
See Section 1.1 for detailed guidance on completing identification fields.
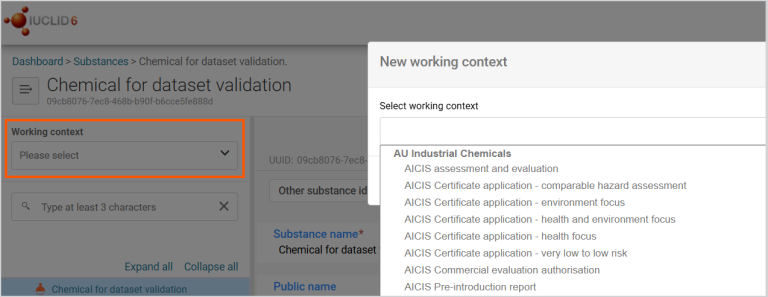
AICIS working context
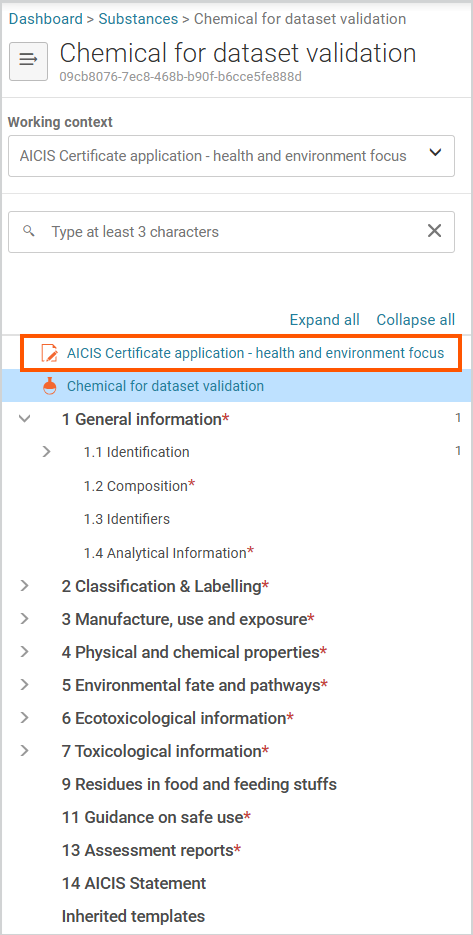
Select the AICIS application type under working context. After you do this, the AICIS working context will display.
Choosing the correct working context is essential as you cannot change it later. Do this before entering any data.
In IUCLID, a working context tells the system which information you need to provide and how it is structured for a specific application. Selecting an AICIS working context ensures:
- only relevant sections and fields display
- the dataset aligns with AICIS assessment certificate requirements
- correct IUCLID validation checks are applied.
Step 3: Set up reusable reference information (entities)
The entities stored in Inventory manager are pieces of information you can reuse. Once created, you can select and link wherever you need in your dataset. This helps you avoid repeating information and keeps your data consistent across sections.
Create reusable entities before you complete technical sections (for example, Section 3). This ensures you can select existing information instead of entering it again.
You can create reusable entities:
- in advance using the Inventory manager, or
- while completing a document when prompted.
You may need to create entities such as:
- legal entities
- contacts
- sites
- reference substances
- test materials
- literature references.
You can then use these entities across:
- multiple sections within a dataset
- multiple datasets
- future submissions.
Tip: The Inventory manager lets you create and store reusable reference information called ‘entities’. These can be linked to one or more substance datasets.
We explain this in more detail in the Resuable entities chapter.
Step 4: Complete required IUCLID sections
Next complete the IUCLID documents required for your AICIS working context. Complete all sections required for your role and application type.
We do not publish study reports or supporting documents that you attach in IUCLID.
Documents in IUCLID are grouped into sections, such as:
- General information
- Classification and labelling
- Manufacture, use and exposure
- Physical and chemical properties
- Environmental fate
- Ecotoxicological information
- Toxicological information.
We explain information requirements for each of these topics in our Substances section.
Important points
- Complete all required fields in each document.
- A document is considered complete when all required fields are filled and any relevant supporting information is included.
- You must also complete all required structured fields – do not rely on attachments alone, they are not enough.
- Some sections may not apply, depending on your dataset scope and role.
- Dynamic fields appear or disappear based on your earlier selections.
You must complete IUCLID documents based on your role in the application and the data you hold. You do not need to complete documents in numerical order as IUCLID uses numbering only to organise information.
Step 5: Address data gaps (if applicable)
If you cannot provide required information, you may need to:
- request an information waiver with appropriate justification – see our information waiver guidance
- use read-across approaches (analogue or category) – if you rely on read-across, you must follow our guidance to justify your approach and report it correctly in IUCLID (see How to report read-across in IUCLID).
- reference existing studies or literature.
You must report these approaches in IUCLID using the relevant document types and templates.
Step 6: Validate the dataset
The Validation assistant checks whether you’ve provided the key information for your application type. It produces a report that shows any failures or warnings and explains how to address them.
Resolve all validation failures. Address warnings where possible or explain them in the relevant fields before proceeding.
We step you through the validation process later in this guide.
Step 7: Export the dossier file
After validation:
- export the dataset as an .i6z dossier file
- select Export to previous major version to ensure compatibility
- if you identify an issue after export, update your dataset and export a new dossier.
- Confirm that the exported file reflects your final, complete dataset. The dossier you export is a read-only version of your dataset at the time of export.
We step you through this process thoroughly in our validation chapter.
Step 8: Keep your IUCLID records
Your IUCLID dataset:
- serves as your official record of information you have submitted
- allows you to reuse or adapt information for future submissions
- helps you meet your record keeping obligations.
Retain both the IUCLID dataset and the exported dossier file.
Key points to remember
- IUCLID organises information by documents and sections, not by process steps.
- Multiple participants (such as applicants, agents or chemical data providers) may create separate dossiers for a single assessment certificate application.
- To avoid delays it’s essential to follow our validation steps and to correctly export the dossier file.
- IUCLID datasets are participant specific, but we assess the dossiers together.
Next: learn how to navigate IUCLD and complete common field types before starting your dataset